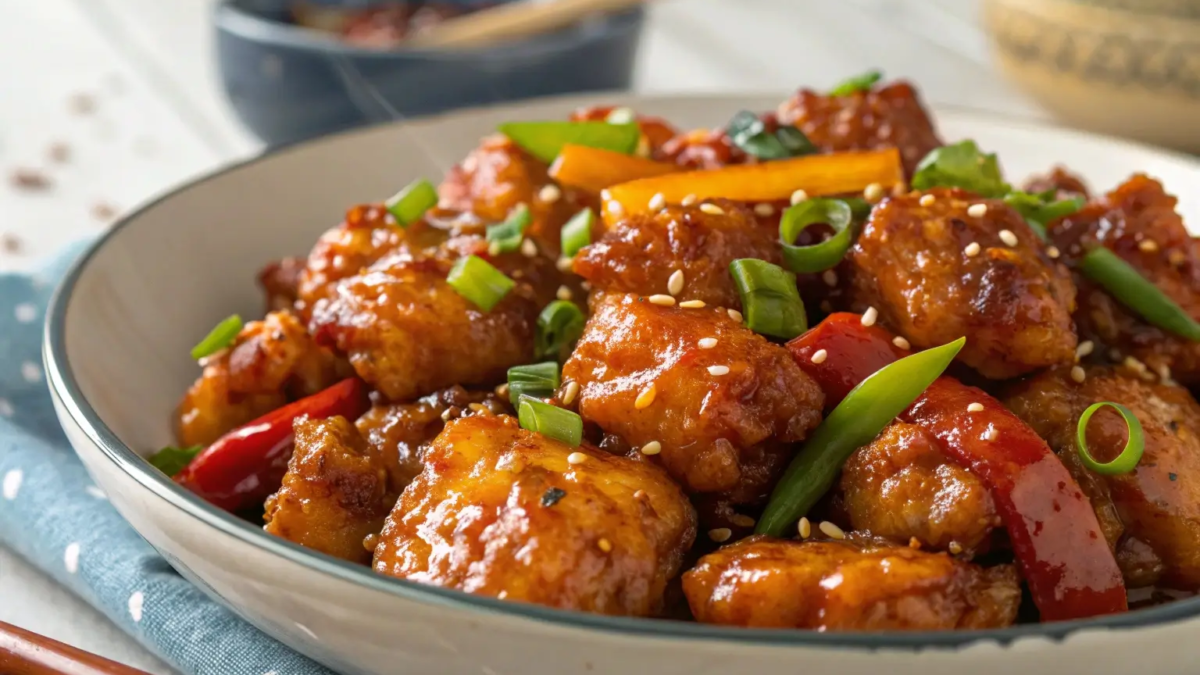
If you’re looking for a flavor-packed, easy-to-make chicken dish, you’ve just hit the jackpot! This honey garlic chicken is a perfect balance of sweet, savory, and garlicky goodness. Whether you’re cooking for your family, meal prepping for the week, or just craving a quick yet delicious meal, this dish is a must-try.
But here’s the thing many people make common mistakes when cooking honey garlic chicken, like ending up with dry chicken, a watery sauce, or even a burnt mess. But don’t worry! I’ll walk you through step-by-step instructions, cooking tips, and even troubleshooting tricks to ensure you nail this recipe every single time.
Table of Contents
Why You’ll Love This Honey Garlic Chicken
So, why should you give this recipe a shot? Well, here are a few reasons why this honey garlic chicken will become your new favorite meal:
✔️ Easy to Make: Takes less than 30 minutes from start to finish.
✔️ Budget-Friendly: Uses simple, pantry-friendly ingredients.
✔️ Packed with Flavor: Sweet honey, bold garlic, and a touch of soy sauce create an irresistible sauce.
✔️ Versatile: Can be served with rice, noodles, or veggies.
✔️ Kid-Friendly: Even picky eaters will love this!
✔️ Healthier Option: Can be made with lean chicken and natural sweeteners.
And the best part? You don’t need to be a professional chef to make this restaurant-quality dish at home
Ingredients Needed for the Perfect Honey Garlic Chicken
Before we start cooking, let’s get everything prepped! Here’s what you’ll need:
📝 Ingredients List:
| Ingredient | Quantity |
|---|---|
| Boneless, skinless chicken breasts or thighs | 2 large (about 1 lb) |
| Salt & black pepper | To taste |
| Cornstarch (for coating) | 2 tbsp |
| Olive oil or butter | 2 tbsp |
| Garlic (minced) | 4 cloves |
| Honey | ¼ cup |
| Soy sauce (low sodium preferred) | ¼ cup |
| Apple cider vinegar (or rice vinegar) | 1 tbsp |
| Water | ¼ cup |
| Red pepper flakes (optional, for spice) | ½ tsp |
| Sesame seeds & chopped green onions (for garnish) | As needed |
Pro Tip:
Want to make it extra crispy? Use cornstarch when pan-frying your chicken it creates a beautiful golden crust that absorbs the sauce perfectly
Main Ingredients and Their Benefits
Let’s break down why each ingredient is crucial for the best honey garlic chicken:
Garlic: The star of the show! It adds a bold, savory punch that balances out the sweetness of honey. Plus, it’s loaded with antioxidants and health benefits.
Honey: Provides natural sweetness and helps create that sticky, glossy sauce. It also adds a caramelized depth when cooked properly.
Chicken: A high-protein, lean meat that absorbs flavors beautifully. Thighs are juicier, but breasts work great if cooked correctly.
Soy Sauce: Brings umami depth, making the dish rich and flavorful. Low sodium is best for controlling saltiness.
Vinegar: Adds a slight tang, balancing the sweetness and enhancing the overall taste.
Cornstarch: Helps thicken the sauce and gives the chicken a crispy texture when fried.
Substitutions and Variations for Dietary Preferences
Want to switch things up? Here are some variations:
Gluten-Free Version: Use tamari or coconut aminos instead of soy sauce.
Protein Swap: Try this recipe with shrimp, tofu, or even salmon for a different twist.
Spicy Version: Add sriracha, chili flakes, or fresh chili for an extra kick.
Low-Carb Option: Skip the cornstarch and serve with cauliflower rice or zucchini noodles.
Now that we have our ingredients ready, let’s start cooking
Step-by-Step Instructions to Make Honey Garlic Chicken
1️⃣ Preparation Steps Before Cooking
Before turning on the stove, let’s get organized:
✅ Pat the chicken dry with a paper towel (removes excess moisture for better searing).
✅ Cut into bite-sized pieces (for quick cooking).
✅ Season with salt & pepper to enhance flavor.
✅ Coat with cornstarch (for that crispy texture).
2️⃣ Cooking the Chicken to Perfection
🔥 Step 1: Heat the pan
- Add olive oil or butter to a pan over medium-high heat.
🔥 Step 2: Sear the chicken
- Place the chicken pieces in the pan in a single layer (don’t overcrowd!).
- Cook for 4-5 minutes per side, flipping once, until golden brown.
- Remove the chicken and set it aside.
“Want extra crispy chicken? Let it sear undisturbed for a few minutes before flipping. That’s how you get that golden crust!”
3️⃣ Making the Honey Garlic Sauce – The Secret to Flavor
🍯 Step 1: Sauté the garlic
- In the same pan, add minced garlic and cook for 30 seconds until fragrant.
🍯 Step 2: Add the sauce ingredients
- Pour in honey, soy sauce, vinegar, water, and red pepper flakes.
- Stir well and let it simmer for 2-3 minutes until slightly thickened.
“The sauce should be glossy, not watery. If it’s too thin, let it cook a little longer.”
4️⃣ Combining Everything – Bringing the Dish Together
🍗 Step 1: Add the chicken back
- Toss the cooked chicken in the sauce until fully coated.
🍗 Step 2: Simmer for another 2 minutes
- This helps the flavors soak into the chicken!
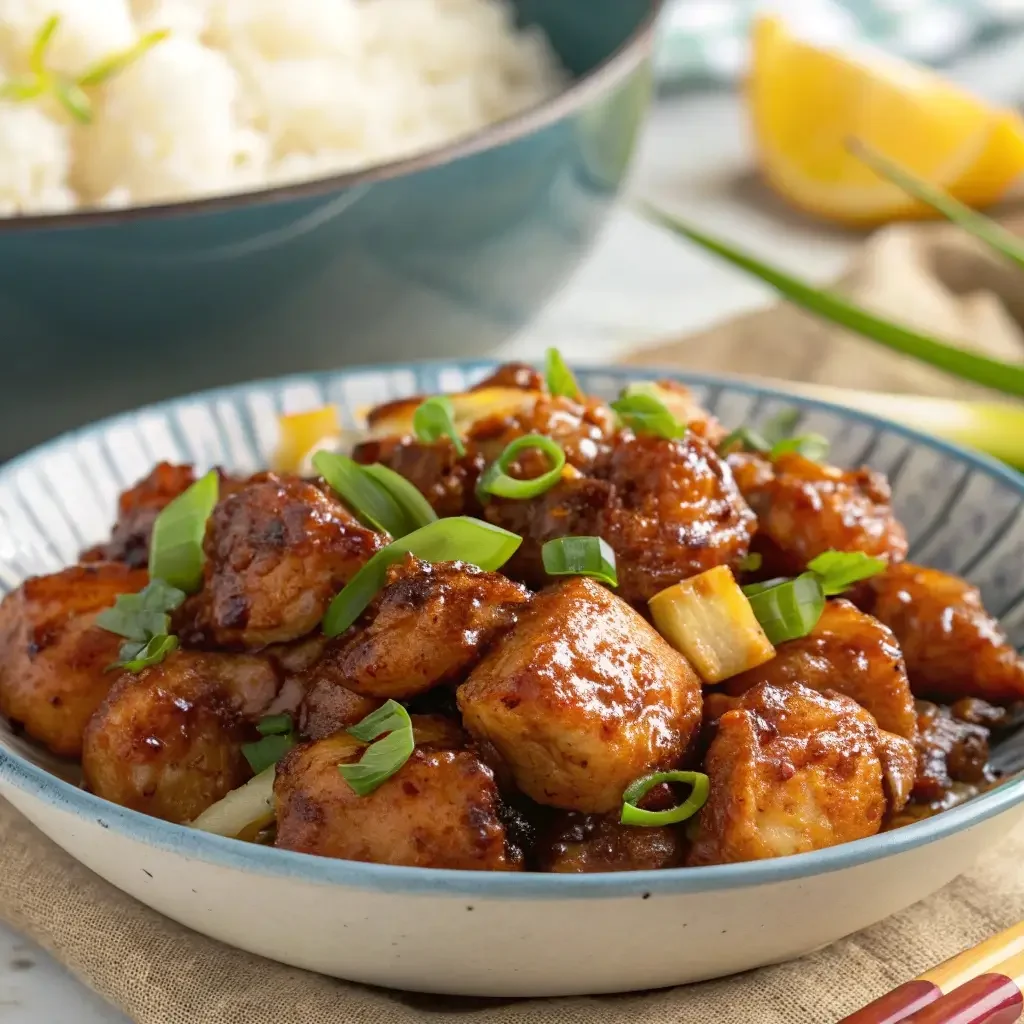
🍗 Step 3: Garnish & serve
- Sprinkle with sesame seeds and green onions for extra flavor.
Best Cooking Methods: Stove, Oven, Slow Cooker, or Air Fryer?
One of the best things about honey garlic chicken is its versatility. Whether you want a quick stovetop meal, a crispy oven-baked version, or a set-it-and-forget-it slow cooker method, there’s a cooking style for everyone. Let’s explore each option and how to adjust the recipe accordingly.
1️⃣ Stovetop Honey Garlic Chicken (Quick & Easy)
⏱ Time: 20-25 minutes
🔥 Best for: Quick meals, crispy texture
How to Cook on the Stove:
- Heat oil in a pan over medium-high heat.
- Sear the chicken until golden brown, about 4-5 minutes per side.
- Remove the chicken and set aside.
- Sauté garlic, then add honey, soy sauce, vinegar, and water.
- Simmer for 2-3 minutes until the sauce thickens.
- Toss the chicken back into the sauce and cook for another 2 minutes.
🔥 Why Choose This Method?
- Super fast & easy for busy weeknights.
- Gives the chicken a nice sear and caramelization.
“If you’re short on time, the stovetop version is your best bet!”
2️⃣ Oven-Baked Honey Garlic Chicken (Crispy & Juicy)
⏱ Time: 30-40 minutes
🔥 Best for: Even cooking, minimal hands-on time
How to Cook in the Oven:
- Preheat oven to 400°F (200°C).
- Place seasoned chicken in a baking dish.
- Bake uncovered for 20 minutes.
- Meanwhile, prepare the honey garlic sauce.
- Remove chicken, brush with sauce, and bake for 10 more minutes.
- Broil for 2-3 minutes for extra crispiness.
🔥 Why Choose This Method?
- Hands-free cooking (just pop it in the oven!).
- Perfect if you’re cooking for a family or meal prep.
“Oven-baking locks in moisture and makes cleanup a breeze!”
3️⃣ Slow Cooker (Crockpot) Honey Garlic Chicken (Tender & Flavorful)
⏱ Time: 4-6 hours
🔥 Best for: Meal prep, extra juicy chicken
How to Cook in a Slow Cooker:
- Place raw chicken in the slow cooker.
- In a bowl, mix honey, soy sauce, vinegar, garlic, and water.
- Pour sauce over the chicken.
- Cover and cook on LOW for 4-6 hours or HIGH for 2-3 hours.
- Thicken the sauce by mixing cornstarch with water and adding it in the last 30 minutes.
🔥 Why Choose This Method?
- Set it and forget it – no need to stand by the stove!
- Chicken becomes fall-apart tender.
“Perfect for busy days when you want a homemade meal with zero effort!”
4️⃣ Air Fryer Honey Garlic Chicken (Crispy & Healthy)
⏱ Time: 20 minutes
🔥 Best for: Crispy, healthier alternative
How to Cook in an Air Fryer:
- Preheat air fryer to 375°F (190°C).
- Toss chicken pieces in a little oil and cornstarch.
- Air fry for 12-15 minutes, shaking halfway.
- Meanwhile, cook the honey garlic sauce on the stove.
- Toss air-fried chicken in the sauce before serving.
🔥 Why Choose This Method?
- Uses less oil but still gets crispy.
- Cooks faster than the oven with better texture.
“An air fryer is a game-changer for crispy chicken without the grease!”
Most Common Problems and How to Fix Them
Even the best recipes can go wrong sometimes! Here are the most common honey garlic chicken cooking mistakes and how to fix them.
❌ Problem #1: The Chicken Turns Out Dry
✅ Solution:
- Use chicken thighs instead of breasts (they’re juicier!).
- Don’t overcook – use a meat thermometer (165°F or 75°C is perfect).
- Let the chicken rest for 5 minutes after cooking to retain moisture.
“Juicy chicken is all about proper timing keep an eye on that temp!”
❌ Problem #2: The Sauce Is Too Thin
✅ Solution:
- Mix 1 tbsp cornstarch with 2 tbsp water and stir into the sauce.
- Let it simmer a bit longer to thicken naturally.
- Reduce the water content next time for a thicker consistency.
“A good sauce should coat the back of a spoon thick, but pourable!”
❌ Problem #3: The Sauce Is Too Thick or Sticky
✅ Solution:
- Add a splash of water or chicken broth to loosen it up.
- Reduce heat when cooking the sauce to prevent it from getting too sticky.
“Honey thickens quickly low heat is your best friend!”
❌ Problem #4: Sauce Burns in the Pan
✅ Solution:
- Lower the heat when adding honey and soy sauce.
- Use a non-stick pan or a well-seasoned cast iron skillet.
“Burnt sugar is no fun! Keep an eye on the sauce and stir often.”
What to Serve with Honey Garlic Chicken?
Now that you’ve got a perfect batch of honey garlic chicken, what should you serve it with? Here are some delicious pairing ideas.
🥢 Best Side Dishes to Complement the Flavor
🍚 Steamed Rice: White, brown, or jasmine rice soaks up the sauce beautifully.
🥦 Stir-Fried Veggies: Broccoli, bell peppers, or snow peas add freshness.
🍜 Noodles: Try it with lo mein, ramen, or soba noodles for a takeout-style meal.
🥑 Avocado Slices: Adds a creamy contrast to the sweet and savory sauce.
🍽 Perfect Meal Pairing Table
| Side Dish | Why It Works |
|---|---|
| White Rice | Absorbs the sauce perfectly |
| Brown Rice | A healthier, fiber-rich option |
| Garlic Butter Noodles | Adds an extra garlic kick |
| Roasted Broccoli | Balances the sweetness with crunch |
| Sautéed Mushrooms | Earthy and complements the soy sauce |
Storage and Reheating Tips
So, you’ve made a delicious batch of honey garlic chicken, but what if you have leftovers? No worries! Proper storage and reheating will keep your meal tasting just as good the next day.
How to Store Leftovers Properly
Proper storage is key to keeping your chicken fresh and flavorful. Follow these tips:
🥡 Refrigerator:
- Place leftovers in an airtight container and store in the fridge for up to 4 days.
❄️ Freezer:
- Want to save it for later? Freeze for up to 3 months in a sealed, freezer-safe container.
- Pro Tip: Store sauce separately to prevent the chicken from getting soggy.
“Always let the chicken cool before storing to avoid condensation (which can make it soggy).”
🔥 Best Ways to Reheat Without Losing Flavor
Reheating chicken the wrong way can make it dry or rubbery. Here’s how to do it right:
🥘 Stovetop (Best for Crispy Chicken!)
- Heat a pan over medium heat and add a splash of water.
- Add chicken and stir occasionally until warm (about 5 minutes).
♨️ Microwave (Quick & Easy)
- Cover with a damp paper towel and microwave for 1-2 minutes.
- Stir halfway to ensure even heating.
🔥 Oven (Best for Large Batches)
- Preheat oven to 350°F (175°C).
- Place chicken in a baking dish, cover with foil, and heat for 10-15 minutes.
“Avoid high heat when reheating—slow and steady keeps the chicken juicy!”
Health Benefits of Honey Garlic Chicken
Not only is honey garlic chicken delicious, but it’s also packed with nutritional benefits!
🍗 Nutritional Breakdown (Per Serving)
Nutrient Amount Calories ~320 kcal Protein ~30g Carbs ~28g Fats ~10g Fiber ~1g Why Is This Dish a Healthy Choice?
✅ Rich in Protein: Chicken is an excellent source of lean protein, which helps with muscle growth and repair.
✅ Heart-Healthy Honey: Unlike refined sugar, honey provides natural sweetness with antioxidants.
✅ Garlic Boosts Immunity: Garlic is known for its antibacterial and anti-inflammatory properties.
✅ Low in Unhealthy Fats: When cooked with minimal oil, this dish is light yet satisfying.
Frequently Asked Questions (FAQs)
Got more questions? Here are some common queries people have about honey garlic chicken
Can I Use Other Proteins Instead of Chicken?
✅ Yes! This recipe works with:
- Shrimp (Quick and light!)
- Salmon (Rich and flavorful!)
- Tofu (Perfect for a vegetarian option!)
“Just adjust the cooking time based on the protein you choose.”
❓ Is This Recipe Kid-Friendly?
✅ Absolutely! Kids love the sweet and savory combination.
✅ If making it for young kids, you can:
- Reduce the garlic for a milder flavor.
- Skip the red pepper flakes if they don’t like spice.
“This dish is a great way to get picky eaters to enjoy protein!”
How Long Does It Take to Cook Honey Garlic Chicken?
Total Time: 20-30 minutes, depending on the method.
- Stovetop: ~20 minutes
- Oven: ~30-40 minutes
- Slow Cooker: ~4-6 hours
- Air Fryer: ~20 minutes
“No matter how you cook it, honey garlic chicken is a quick, easy, and flavorful meal!”
Final Thoughts – Why This Recipe is a Must-Try!
If you’re looking for a fast, flavorful, and foolproof meal, this honey garlic chicken recipe is the perfect choice. With simple ingredients, multiple cooking methods, and easy customization, it’s a recipe that never fails!
💡 Why You’ll Love It Again and Again:
✔ Quick and easy to make – Perfect for busy weeknights!
✔ Packed with bold flavors – Sweet, garlicky, and just a little tangy.
✔ Versatile and customizable – Serve it with rice, noodles, or veggies.
✔ Great for meal prep – Stays delicious for days!“Once you try this recipe, you’ll wonder why you ever ordered takeout!”
Ready to cook? Grab your ingredients and get started today
Add a Comment